Planning your 2024 travel photography adventures? Choosing the right lenses is crucial for capturing stunning images, whether you’re exploring bustling city streets or serene landscapes. This guide delves into the essential lenses every travel photographer should consider, helping you make informed decisions based on your style and needs. We’ll explore wide-angle, telephoto, and versatile zoom lenses, weighing their benefits and drawbacks to guide you toward the perfect photographic companions for your journey.
From backpacking essentials to managing storage effectively, we’ll cover practical aspects of travel photography, including gear choices, accessories, and essential techniques. Learn how to optimize camera settings for various lighting conditions and master composition techniques that will elevate your travel photos from snapshots to captivating stories. We’ll even touch on travel hacks and insurance considerations to ensure a smooth and successful photographic expedition.
Essential Lenses for Travel Photography in 2024

Choosing the right lenses is crucial for capturing stunning travel photos. The ideal lens selection depends on your photographic style and the types of scenes you anticipate encountering. This guide will help you navigate the options and select lenses that best suit your travel photography needs.
Wide-Angle Lenses for Travel Photography
Wide-angle lenses are indispensable for showcasing expansive landscapes, capturing architectural details, and creating immersive perspectives. Their ability to fit more into the frame makes them perfect for diverse travel scenarios.
| Lens | Focal Length | Image Stabilization | Weight (approx.) | Price Range (USD) |
|---|---|---|---|---|
| Canon EF 16-35mm f/2.8L III USM | 16-35mm | Yes | 619g | $1800 – $2200 |
| Nikon AF-S NIKKOR 14-24mm f/2.8G ED | 14-24mm | No | 1020g | $1900 – $2300 |
| Sony FE 16-35mm f/2.8 GM | 16-35mm | Yes | 577g | $2200 – $2500 |
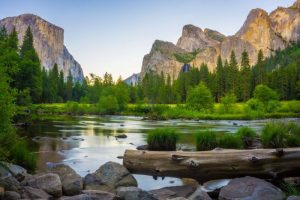
Ideal situations for using a wide-angle lens include capturing the grandeur of mountain ranges, the bustling atmosphere of a crowded market, or the intricate details of ancient architecture. For example, a wide-angle lens allows you to capture the entire facade of a cathedral, showcasing its architectural details and surrounding environment in a single frame. Similarly, it’s perfect for capturing the vastness of a desert landscape or the dramatic perspective of a towering cityscape.
Prime vs. Zoom Lenses for Travel Photography
Prime lenses (fixed focal length) offer superior image quality and often faster apertures, leading to better low-light performance and shallower depth of field. However, their fixed focal length requires more physical movement to adjust the composition. Zoom lenses (variable focal length) offer versatility, allowing you to adjust the focal length without changing lenses. This convenience is beneficial for diverse shooting situations.
However, they generally offer slightly lower image quality and slower maximum apertures compared to prime lenses. The choice depends on prioritizing image quality and low light performance versus convenience and versatility.
Telephoto Lenses for Wildlife and Street Photography
Telephoto lenses are invaluable for wildlife and candid street photography. Their ability to compress perspective and magnify distant subjects allows for capturing detailed images of wildlife from a safe distance. In street photography, a telephoto lens enables capturing candid moments without intruding on the subjects’ personal space. A longer focal length, for example 70-200mm or even longer, helps isolate subjects within a busy street scene, creating compelling portraits and environmental storytelling.
A Versatile Zoom Lens for Travel
The Tamron 28-200mm f/2.8-5.6 Di III RXD lens offers a remarkable range, covering wide-angle to telephoto perspectives. Its relatively compact size and lightweight design make it ideal for travel. Its image stabilization helps to minimize blur, particularly in low light or when shooting handheld. The lens’s versatility allows for capturing a variety of subjects, from landscapes and cityscapes to portraits and close-ups, all without changing lenses.
This makes it a truly practical choice for travelers who prioritize versatility and convenience without sacrificing image quality.
Choosing the Right Gear for Different Travel Styles
Selecting the appropriate photography equipment significantly impacts the success and enjoyment of your travel photography experience. The ideal gear depends heavily on your travel style, priorities (lightweight vs. high image quality), and the type of photography you intend to pursue. Consider your budget and the trade-offs between portability and image quality when making your choices.
Backpacking Trip Photography Packing List
A backpacking trip demands prioritizing lightweight and compact equipment. Overly bulky gear will quickly become a burden. The focus should be on versatility and minimizing the number of items carried.
- Mirrorless camera with one versatile zoom lens (e.g., a 24-70mm equivalent): This combination offers a good balance between image quality and portability.
- Small, lightweight tripod: Essential for sharp low-light shots and stable long exposures. Carbon fiber tripods are ideal for their strength-to-weight ratio.
- Spare battery: Avoid missing crucial shots due to a dead battery. Consider a lightweight, high-capacity model.
- Compact cleaning kit (microfiber cloth, blower brush): Maintaining lens cleanliness is vital for sharp images.
- SD card with ample storage: Choose a fast, high-capacity card to prevent slowdowns and ensure you can capture plenty of photos and videos.
- Small, waterproof backpack or case: Protect your gear from the elements.
Essential Photography Accessories and Their Importance
Accessories can significantly enhance your photography experience and protect your investment. Carefully selecting these items ensures your gear is well-maintained and ready for any situation.
- Filters: Neutral Density (ND) filters reduce light entering the lens, allowing for creative effects like slow shutter speeds for water blurring or brighter apertures in bright sunlight. Polarizing filters reduce glare and enhance color saturation. A circular polarizer is generally a good starting point.
- Cleaning Kit: A microfiber cloth and blower brush are essential for removing dust and fingerprints from lenses and camera sensors. Avoid using harsh chemicals or abrasive materials.
- Extra Batteries: Having at least one, preferably two, extra batteries is crucial, especially on long days of shooting or in cold weather conditions. Batteries drain faster in cold temperatures.
- Lens Pen: A lens pen is a convenient and effective way to remove dust and smudges from your lenses without the need for liquids.
- Camera Strap: A comfortable and secure camera strap is essential for carrying your camera comfortably for extended periods.
Mirrorless Cameras vs. DSLRs for Travel Photography
Both mirrorless and DSLR cameras offer excellent image quality, but their portability and functionality differ.
| Feature | Mirrorless | DSLR |
|---|---|---|
| Size and Weight | Generally smaller and lighter | Typically larger and heavier |
| Image Quality | Comparable to DSLRs, often with better high ISO performance | Excellent image quality, especially in professional models |
| Viewfinder | Electronic viewfinder (EVF) or optical viewfinder (OVF) | Optical viewfinder (OVF) |
| Battery Life | Generally shorter battery life | Typically longer battery life |
The Importance of a Sturdy Camera Bag and Suitable Options
A sturdy camera bag protects your valuable equipment from bumps, drops, and the elements. The choice of bag depends on your travel style.
- Backpacking: A small, lightweight backpack designed for camera gear with good padding and weather resistance is ideal. Look for features like dedicated compartments for lenses and accessories.
- Day Trips: A shoulder bag or sling bag provides easy access to your camera while offering decent protection. Consider bags with weather-resistant materials.
- Longer Trips/Flights: A larger rolling camera bag is suitable for carrying more equipment, offering excellent protection and ease of transport for longer journeys.
Managing Photo and Video Storage While Traveling
Effective storage management is vital to prevent losing precious memories.
- Regular Backups: Use cloud storage services (e.g., Google Photos, Dropbox, iCloud) or external hard drives to regularly back up your photos and videos. Consider backing up to multiple locations for redundancy.
- High-Capacity Cards: Utilize high-capacity SD cards to maximize storage on your camera. Always carry at least one spare card.
- Selective Deletion: Regularly review your photos and videos and delete any unwanted or duplicate images to free up space. Consider using image editing software to optimize your images before saving.
- File Compression: For longer trips, consider compressing your files (e.g., using JPEG instead of RAW) to save space, but remember this will reduce image quality.
Travel Photography Techniques and Tips
Mastering travel photography involves more than just having the right equipment; it requires understanding composition, light, and the art of storytelling. This section delves into essential techniques and tips to elevate your travel photography.
Creative Composition Techniques
Effective composition is crucial for visually compelling travel photographs. Five techniques significantly enhance the impact of your images. These techniques move beyond simply pointing and shooting, encouraging you to actively engage with your subject and its surroundings.
- Rule of Thirds: Instead of centering your subject, place it at one of the four intersection points created by dividing your frame into thirds both horizontally and vertically. This creates a more balanced and visually appealing image, leading the viewer’s eye naturally through the scene. For example, positioning a majestic mountain range along one of the horizontal thirds, with the foreground elements along another, generates a more dynamic image than simply centering the mountain.
- Leading Lines: Utilize natural lines within the scene—roads, rivers, fences—to guide the viewer’s eye towards your main subject. This creates depth and visual interest, drawing the viewer into the photograph. Imagine a winding road leading to a picturesque village nestled in the mountains; the road itself acts as a leading line, emphasizing the village’s remote beauty.
- Symmetry and Patterns: Look for repeating patterns or symmetrical elements in your environment. These create a sense of order and visual harmony, making for striking images. Think of a perfectly aligned row of colorful buildings, or the symmetrical reflection of a cityscape in calm water – these elements can produce powerful and captivating photographs.
- Framing: Use natural frames—archways, trees, or even people—to draw attention to your subject. This technique adds depth and context, isolating your subject while still integrating it within its environment. For instance, framing a bustling marketplace through a doorway adds a sense of intrigue and draws the viewer’s focus to the scene’s vibrant activity.
- Negative Space: Intentionally leave significant empty space in your composition. This can create a sense of solitude, vastness, or emphasize the scale of your subject. A lone tree standing in a vast desert landscape, for instance, utilizes negative space to powerfully convey a sense of isolation and the scale of the desert.
Capturing Stunning Sunrise/Sunset Shots
Sunrise and sunset offer exceptional lighting opportunities. A systematic approach ensures you capture the magic of these fleeting moments.
- Location Scouting: Research potential locations beforehand, considering factors like clear horizons and interesting foreground elements.
- Arrive Early/Stay Late: Give yourself ample time to set up your shot and experiment with different compositions. The “golden hour” extends beyond the precise moment of sunrise/sunset.
- Camera Settings: Use a tripod for stability, a relatively low ISO (100-400), a moderate aperture (f/8-f/16 for landscapes), and adjust your shutter speed accordingly to achieve proper exposure. Consider using a remote shutter release to avoid camera shake.
- Metering and Exposure Compensation: Use evaluative or matrix metering, and be prepared to adjust exposure compensation to account for the dynamic range of the scene. You might need to underexpose slightly to prevent the brightest areas from being blown out.
- Experiment with Filters: Neutral density (ND) filters can help you shoot with longer exposures during the brighter parts of the golden hour, and graduated neutral density (GND) filters can balance the exposure between the sky and the foreground.
Optimal Camera Settings for Different Situations
Understanding the interplay between aperture, shutter speed, and ISO is essential for adapting to diverse photographic situations.
| Situation | Aperture | Shutter Speed | ISO |
|---|---|---|---|
| Low Light | f/1.4 – f/2.8 (wide open for maximum light gathering) | Slow (1/30s or slower, potentially requiring a tripod) | High (800-6400 or higher, depending on your camera’s capabilities and noise performance) |
| Action Shots | f/2.8 – f/5.6 (balance between depth of field and shutter speed) | Fast (1/500s or faster) | Moderate (200-800) |
| Landscapes | f/8 – f/16 (for maximum depth of field) | Variable (depending on lighting conditions and desired motion blur) | Low (100-400) |
Effective Use of Natural Light
Natural light is your most valuable asset in travel photography. Understanding its qualities—direction, intensity, and color temperature—allows you to craft stunning images.
Utilize the “golden hour” (the hour after sunrise and the hour before sunset) for warm, soft light ideal for portraits and landscapes. The “blue hour” (twilight) provides a cool, moody atmosphere.
By positioning your subjects to take advantage of the direction and quality of natural light, you can significantly enhance your photographs. Side lighting can create texture and dimension, while backlighting can produce silhouettes and dramatic rim lighting.
Storytelling in Travel Photography
Travel photography isn’t just about capturing pretty pictures; it’s about conveying a narrative. Effective storytelling involves more than just showing a place; it’s about showing the experience and emotions associated with it.
A photograph of a bustling market might showcase the vibrant colors and textures, but adding a detail like a child’s curious gaze adds a layer of emotional depth and human connection, enriching the narrative.
For example, a series of images documenting a trek through a mountain range, starting with the preparation at base camp and culminating in the triumphant view from the summit, tells a complete story of the journey. Similarly, a collection of photos depicting daily life in a small village—from farmers tending their fields to children playing in the streets—creates a richer, more immersive narrative than individual, isolated shots.
Travel Hacks, Tips, and Related Information
Successfully navigating the world as a travel photographer requires more than just a great camera and a keen eye. It involves strategic planning, resourcefulness, and a proactive approach to both capturing stunning images and ensuring a smooth, safe journey. This section delves into practical travel hacks, insurance considerations, essential tips, and visa acquisition processes, ultimately aiming to empower you to maximize your photographic opportunities while minimizing potential setbacks.
Five Travel Hacks to Improve Photography Opportunities
Leveraging clever strategies can significantly enhance your photographic prospects while traveling. These hacks range from practical solutions to creative approaches, ultimately leading to richer visual storytelling.
- Pack light, but strategically: Prioritize versatile lenses and essential accessories. Avoid overpacking, which can hinder mobility and increase the risk of lost or damaged equipment. A well-organized camera bag with quick access to frequently used items is crucial.
- Embrace the “golden hour”: The soft, diffused light of sunrise and sunset creates stunning images. Plan your shooting schedule around these times for optimal results, even if it means early mornings or late evenings.
- Utilize natural reflectors: A white wall, a sheet of paper, or even a piece of clothing can act as a reflector, softening shadows and brightening your subject. This simple hack can significantly improve your photos without the need for additional equipment.
- Shoot in RAW format: RAW files contain significantly more image data than JPEGs, allowing for greater flexibility during post-processing. This is particularly beneficial when shooting in challenging lighting conditions.
- Learn basic local phrases: Even a few basic phrases in the local language can significantly improve interactions with locals, potentially leading to unique photographic opportunities and a more immersive experience.
Comprehensive Travel Insurance for Photographers
Travel insurance is not just a precaution; it’s an essential investment for photographers. Standard travel insurance policies often fall short of covering the specific needs and risks faced by photographers.Comprehensive travel insurance for photographers should cover the loss or damage of photographic equipment, including cameras, lenses, and accessories. It should also include medical expenses related to injuries sustained during photography activities, such as hiking or climbing to reach scenic locations.
Consider policies that offer coverage for trip cancellations or interruptions due to unforeseen circumstances, such as equipment malfunctions or weather events. The cost of replacing high-value equipment can be substantial, making adequate insurance coverage paramount. It’s advisable to carefully review policy details and ensure they meet your specific needs before purchasing.
Five Travel Tips to Enhance the Overall Travel Experience
Beyond photography, a well-planned and enjoyable trip enhances creativity and overall satisfaction.
- Research your destination thoroughly: Understanding local customs, transportation options, and potential safety concerns will allow for a smoother and more enjoyable trip.
- Pack versatile clothing: Opt for clothing items that can be mixed and matched, reducing the overall weight and volume of your luggage.
- Stay connected: Purchase a local SIM card or utilize roaming services to stay connected with loved ones and access online resources.
- Learn basic first aid: Having basic first aid knowledge can be invaluable in unexpected situations.
- Embrace spontaneity: While planning is important, leave room for spontaneity and unexpected adventures; some of the best travel experiences arise from the unexpected.
Obtaining a Travel Visa for Photography-Focused Trips to Japan
Securing a visa for photography-focused trips to Japan involves a relatively straightforward process. Generally, photographers will need a tourist visa unless they are participating in a sponsored event or working assignment. The application process usually requires a completed application form, a passport valid for at least six months beyond the intended stay, a recent passport-sized photograph, proof of financial means to support the trip, and evidence of onward travel arrangements (flight or other transportation out of Japan).
Detailed information and specific requirements can be found on the official website of the Japanese embassy or consulate in your country of residence. Applicants should submit their application well in advance of their intended travel dates to allow sufficient processing time.
Urban Escapes: Photography-Rich City Destinations
Many cities offer a wealth of photographic opportunities, from iconic landmarks to hidden alleyways.
- Kyoto, Japan: Known for its traditional architecture, serene gardens, and vibrant street life.
- Paris, France: Iconic landmarks like the Eiffel Tower and Louvre Museum alongside charming cafes and cobblestone streets.
- New York City, USA: A melting pot of cultures and architectural styles, offering a diverse range of photographic subjects.
- London, England: Historic buildings, bustling markets, and vibrant street art provide a rich tapestry of photographic opportunities.
- Buenos Aires, Argentina: A city known for its European-style architecture, tango culture, and vibrant street life.
Benefits and Drawbacks of Using Vacation Packages for Photography Trips
Vacation packages offer a convenient and often cost-effective way to plan a photography trip. However, they also have limitations. Benefits: Packages often include flights, accommodation, and sometimes even guided tours, simplifying the planning process and potentially reducing overall costs. They can also provide access to exclusive experiences or locations that might be difficult to arrange independently. Drawbacks: Pre-packaged itineraries might not always align perfectly with a photographer’s specific needs or desired shooting locations.
The flexibility to adjust the schedule to capture optimal lighting conditions or explore unexpected opportunities may be limited. The quality of accommodation or guided tours included in a package can vary significantly.
Potential for Vacation Programs to Incorporate Photography Workshops or Tours
The integration of photography workshops or tours into vacation packages presents a significant opportunity for growth in the travel industry. Such programs can cater to a niche market of photographers and photography enthusiasts, offering a unique and immersive travel experience. These programs could include guided photography tours, workshops on specific techniques or genres, and opportunities for feedback and interaction with professional photographers.
They could also incorporate elements of cultural immersion and local interaction, enhancing the overall travel experience. Examples include dedicated photography cruises or guided tours focused on specific photographic subjects, such as wildlife or landscapes.
Venture Capital Funding for a Travel Photography Business
Securing venture capital funding for a travel photography business requires a compelling business plan demonstrating significant market potential and a scalable business model. The business plan should clearly articulate the target market, revenue streams (e.g., selling prints, offering workshops, licensing images), and competitive advantages. A strong team with experience in both photography and business management is crucial. Investors will assess the potential for high returns on investment, considering factors such as market size, growth potential, and the team’s ability to execute the business plan.
Successful ventures in this space might involve creating a platform for connecting photographers with clients, offering curated photography tours, or developing innovative products or services related to travel photography.
Ultimately, the best lenses for travel photography in 2024 are those that best suit your individual style and travel plans. By carefully considering the versatility, weight, and image quality of different lens options, you can curate a kit that empowers you to capture breathtaking memories. Remember to prioritize practicality and pack smart; your photographic journey should be as enjoyable as the destinations themselves.
With the right gear and techniques, you’ll be ready to document your adventures and share captivating stories through your lens.
General Inquiries
What is the best lens for low-light travel photography?
A fast prime lens (e.g., f/1.4 or f/1.8) is ideal for low-light situations as it allows more light to reach the sensor, resulting in sharper images with less noise.
How do I protect my lenses during travel?
Use lens caps, a protective lens hood, and store lenses in a padded case or camera bag to prevent scratches and damage during transport.
Should I prioritize a full-frame or crop-sensor camera for travel?
Full-frame cameras offer superior image quality and low-light performance, but crop-sensor cameras are generally smaller, lighter, and more affordable.
What are some essential accessories besides lenses?
Extra batteries, a reliable memory card reader, a cleaning kit for your lenses and sensor, and a sturdy tripod are essential accessories.